Downloading Visual Studio 2019
In order to get started developing scripts for gaming engines, it is important to download an IDE that can edit these script files for you. Visual Studio 2019 makes this as seamless as possible, and will even download Unity for you, shown later.
Download HereGetting help installing Visual Studio
Upon downloading the installer, you will be redirected to a screen providing a link to extra help installing Visual Studio, shown here. Click the button below, or the image, in case you missed it!
Get helpDownloading Unity through Visual Studio Installer
At a certain point during your installation, you will be asked what packages you would like included in your Visual Studio software. Download the packages in the image here. With all of the necesary packages selected, most importantly "Game development with Unity", we can proceed with the download, and notice that Unity gets installed for us. If Unity did not get installed automatically, see the steps below.
Linking Unity to Visual Studio
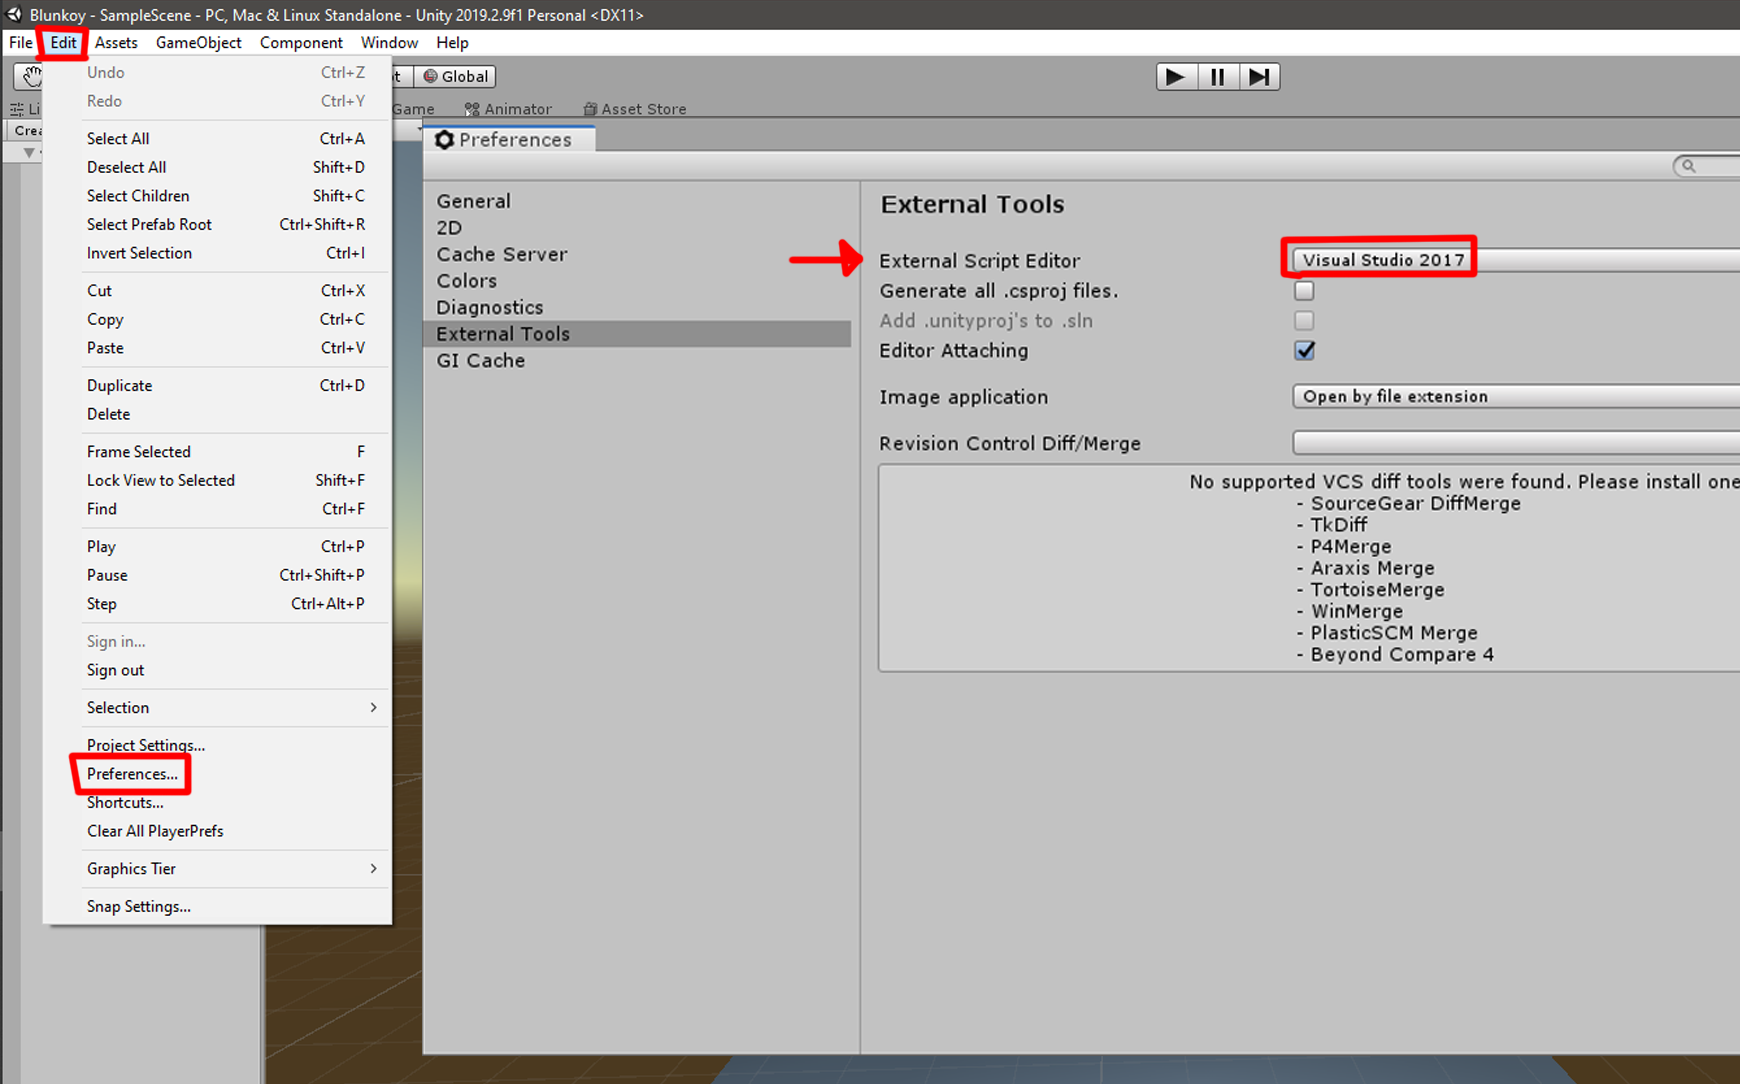
While working within Unity, there will be times when it is necessary to edit a script (C# file) that will affect objects within your game (covered later in the tutorial section). In order to edit scripts seamlessly from Unity, we can select Visual Studio as our default script editor within Unity. To do this, we open the version of Unity we downloaded previously, navigate to Edit > Preferences > External Tools, and choose the version of Visual Studio appropriate for you (or any other text editor you prefer). Visual Studio helps a lot when trying to learn Unity specific methods and classes since it comes with great Intellisense out of the box.
